Introduction :
A soil moisture sensor is a device that measures the volumetric water content in soil. It is commonly used in gardening, agriculture, and environmental monitoring to keep track of soil moisture levels and automate watering systems.
Key Features
- Operating Voltage: 3.3V to 5V
- Output: Analog voltage (typically 0-1023 on the Arduino’s ADC)
- Probe Type: Two-prong (for resistive measurement)
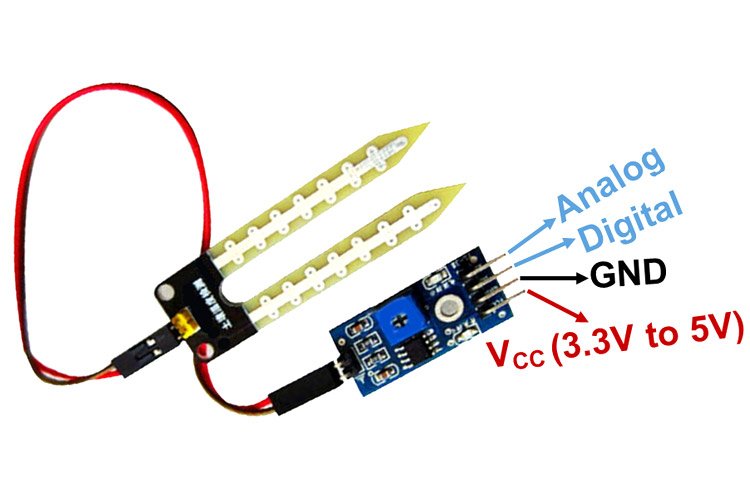
Components
- Soil Moisture Sensor Module: Usually consists of two main parts: the sensor probe and the signal conditioning circuit.
- Sensor Probe: Two metal prongs that are inserted into the soil.
- Signal Conditioning Circuit: Converts the resistance between the probes to a voltage output.
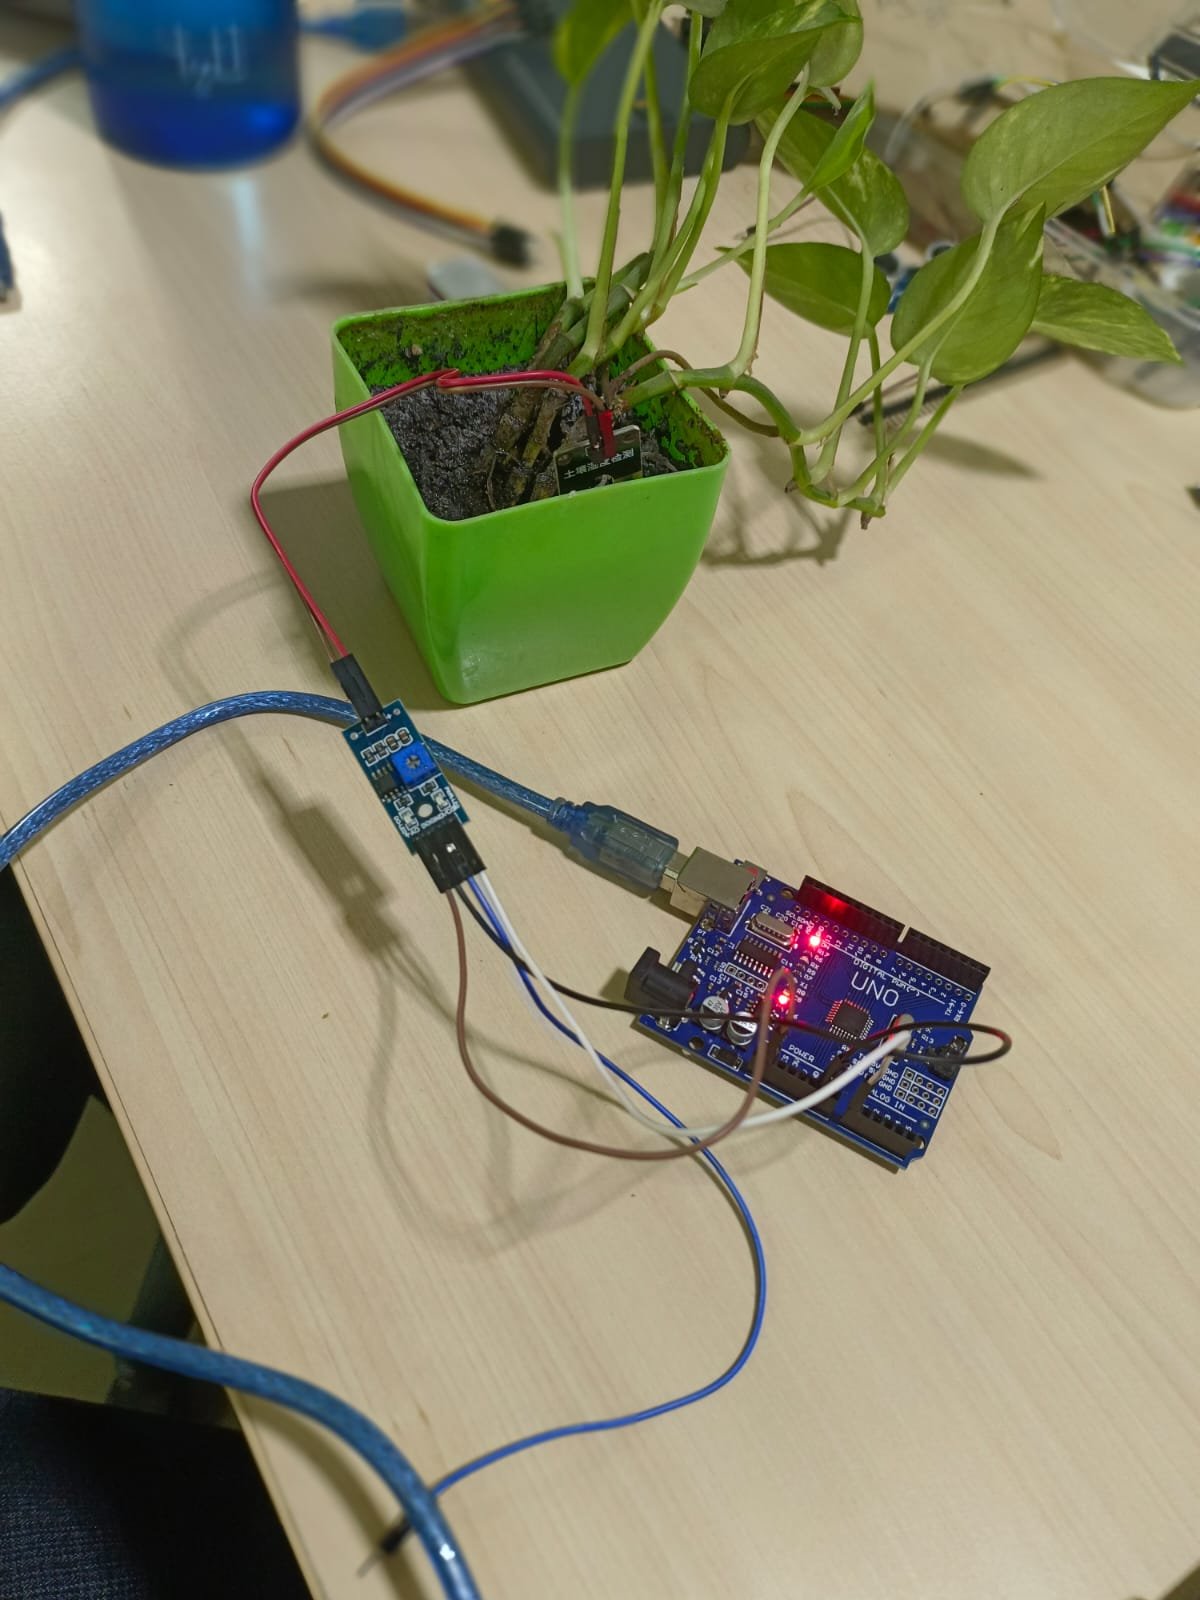
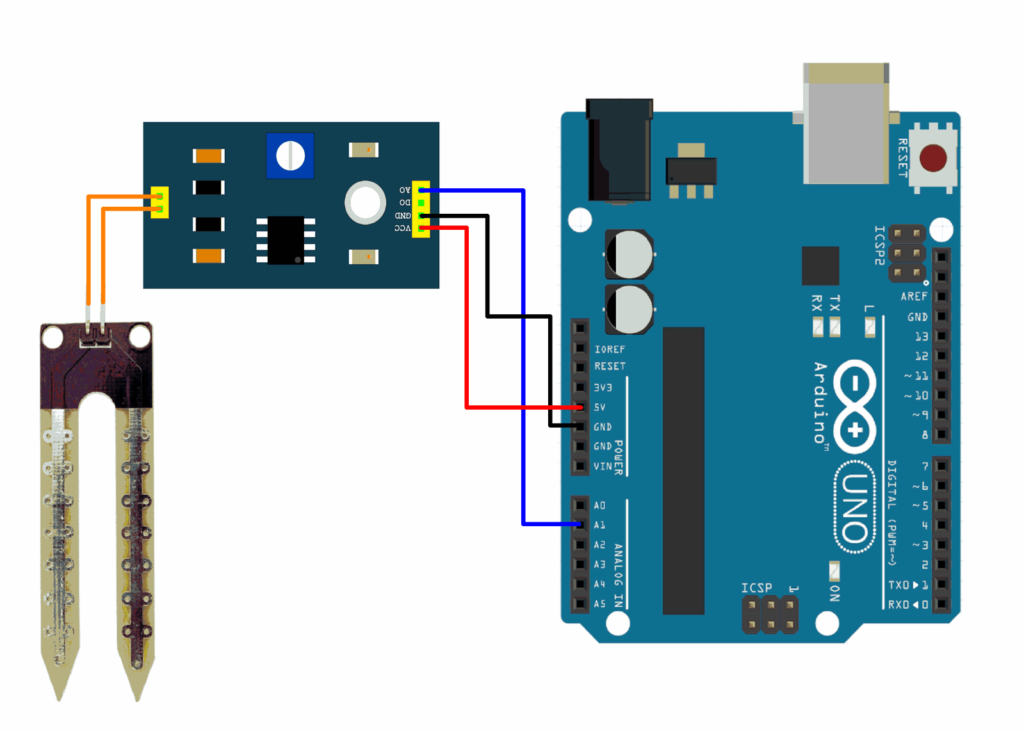
Wiring the Soil Moisture Sensor to Arduino
- VCC (Sensor) to 5V (Arduino)
- GND (Sensor) to GND (Arduino)
- A0 (Sensor) to an analog input pin (e.g., A0) on the Arduino
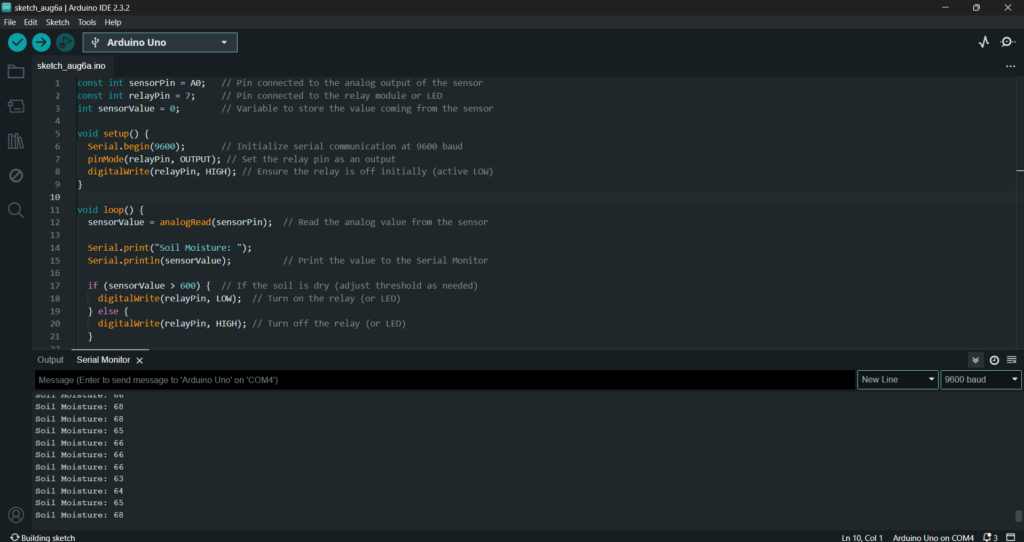
CODE:
const int sensorPin = A0; // Pin connected to the analog output of the sensor
const int relayPin = 7; // Pin connected to the relay module or LED
int sensorValue = 0; // Variable to store the value coming from the sensor
void setup() {
Serial.begin(9600); // Initialize serial communication at 9600 baud
pinMode(relayPin, OUTPUT); // Set the relay pin as an output
digitalWrite(relayPin, HIGH); // Ensure the relay is off initially (active LOW)
}
void loop() {
sensorValue = analogRead(sensorPin); // Read the analog value from the sensor
Serial.print(“Soil Moisture: “);
Serial.println(sensorValue); // Print the value to the Serial Monitor
if (sensorValue > 600) { // If the soil is dry (adjust threshold as needed)
digitalWrite(relayPin, LOW); // Turn on the relay (or LED)
} else {
digitalWrite(relayPin, HIGH); // Turn off the relay (or LED)
}
delay(1000); // Wait for 1 second before taking another reading
}
https://github.com/makertribe/IoT-Codes/blob/bd52674376b39d6ba31d668bebdd77deacbc42a3/Soil%20Moisture%20with%20UNO
Output :